
Table of Contents
- Why Vehicle Customization Visualization Tools Matter
- What to Look for in a Vehicle Customization Tool
- How to Use a Car Wrap Visualizer for Your Vehicle
- Vinyl Wrap vs. Paint: Which Is Right for Your Car?
- Vinyl Wrap Durability: What Affects How Long It Lasts
- Professional Vehicle Wrap Installation: Why It Matters
- Frequently Asked Questions
Last Updated: October 9, 2026
Why Vehicle Customization Visualization Tools Matter
Seeing a modification before you commit is the difference between a confident decision and an expensive regret.
At 203wraps, we have spent over a decade installing vinyl wraps, paint protection film, and window tint on high-end and collectible cars.
That is what a modernimage alternative for vehicle customization solves. These tools render changes onto a photo of your car so you can compare designs before spending money.
What to Look for in a Vehicle Customization Tool
The best vehicle customization tool balances realistic rendering with clear pricing and sensible photo handling. Accuracy matters more than flashy features, and image-ownership fine print matters more than most buyers realize. Here is how to judge a modernimage alternative on criteria that change your outcome.
Accuracy and Realism
Rendering quality is where tools separate. A good preview respects your car’s body lines, lighting, and paint reflections; a weak one slaps flat color over the panels and calls it a wrap.
Judge a tool on four mechanics:
- Vehicle recognition. Does it detect the make, model, and body style from your photo, or do you trace the panels by hand? Automatic detection is faster but fails more often on older, modified, or low-volume vehicles.
- Panel segmentation. Can it isolate body panels from glass, wheels, trim, and lights? If it cannot separate a window from a door, your render will show color bleeding onto the glass.
- Reflection and lighting preservation. The strongest tools keep the original photo’s highlights and shadows and tint the paint beneath them. The weakest replace the whole panel with flat color, which is why cheap renders look like stickers.
Look for tools that accept multiple angles, not just one. Front, rear, and side views reveal how a finish behaves under different light. If a tool handles only a single angle, treat the output as a rough sketch, not a plan.
Pricing, Free Tiers, and Usage Limits
Free tiers are useful for testing but usually cap renders or watermark output. Paid plans unlock higher resolution and more edits.
Before subscribing, check these points:
- Render or credit allowance. Most tools meter generations per month rather than per project. A single wrap decision can burn through a dozen renders once you test gloss, satin, and matte across three angles.
- Watermark policy. Confirm whether the watermark applies to previews only or to every export on the free tier.
- Resolution ceiling. Free exports are often capped well below print or screen-review quality. If you plan to show the render to an installer or a buyer, you need a clean, high-resolution file.
- Auto-renewal terms. Monthly plans frequently renew automatically, and cancellation windows vary. Note the renewal date before you commit.
Privacy and Image Ownership
Your vehicle photo can reveal your location, plate number, and home. Read the terms before uploading.
A trustworthy tool states plainly who owns the uploaded image, how long it is stored, and whether it trains models on it. Vagueness on those points is a signal. For exotic and collectible cars, the photo itself can be sensitive. Look for:
- Retention window. How long the original photo and the render stay on the server after you delete them.
- Deletion controls. Whether you can delete an image yourself or must email support.
- Training use. Whether your uploads feed a model, and whether you can opt out.
- Ownership of the output. Who holds rights to the generated image, and whether you can use it commercially.
Uploading a photo with a visible license plate or house number hands that information to a third party. Crop or blur identifying details before you upload, and confirm the tool’s retention policy in writing.
A Feature Checklist You Can Apply to Any Tool
Use this as a scannable scorecard when you evaluate a modernimage alternative. Rate each row for the tool you are testing:
| Criterion | What to Check | Why It Matters |
|---|---|---|
| Photo upload | Formats accepted (JPG, PNG, HEIC), max file size | Phone photos are often HEIC and large |
| Vehicle recognition | Auto-detect vs. manual panel selection | Speed and accuracy on older or modified cars |
| Modification categories | Color, wrap finish, wheels, tint, stance, body kits | Determines whether one tool covers your whole plan |
| Prompt controls | Text prompts, sliders, presets, or none | Fine control vs. one-click convenience |
| Rendering quality | Reflection, shadow, and proportion handling | Separates a believable preview from a flat recolor |
| Export options | Resolution, watermark, file format | Needed for installer or buyer review |
| Free tier | Render count, watermark, resolution cap | Lets you test before paying |
| Paid tier | Price, renewal terms, commercial rights | Total cost of a real project |
| Privacy | Retention, deletion, training use | Protects your location and vehicle identity |
No single tool wins every row. The right choice depends on whether you are testing one color change or planning a full build, and whether you need commercial rights.
How to Use a Car Wrap Visualizer for Your Vehicle
A car wrap visualizer maps a chosen finish onto a photo of your car, letting you preview the result before any vinyl or paint touches the vehicle. It takes minutes, but your photo quality decides the preview quality.
What These Tools Actually Support
Before you upload, know the limits. Support varies by tool, and the gaps are where renders fail:
- Vehicle types. Most tools handle common sedans, SUVs, and trucks well. Sports cars with complex aero, dually trucks, vans with large flat panels, and motorcycles are hit-or-miss.
- Model years. Newer vehicles are recognized more reliably because training data skews recent. Older and low-volume models often require manual panel selection.
- Angles. Front three-quarter, side profile, and rear three-quarter are the most reliable. Straight-on front and rear views are harder because the renderer has less surface to work with. Extreme angles and close-ups of single panels usually fail.
- Image formats. JPG and PNG are near-universal. HEIC from newer phones is sometimes accepted and sometimes not, so convert if a tool rejects your upload.
A Step-by-Step Workflow
Our recommended workflow:
- Wash the car first. Dirt and reflections confuse the renderer and hide body lines.
- Shoot in even, overcast light. Harsh sun creates blown-out highlights that tools misread.
- Capture three angles. Front three-quarter, side profile, and rear three-quarter cover most changes.
- Upload and select the panels. Most tools let you isolate the body from the glass and wheels. If auto-detection misses, correct it manually before rendering.
- Apply finishes one at a time. Test gloss, satin, and matte separately before combining.
- Check the render against the original. Look at reflections, shadows, and panel gaps. If the finish flattens the reflections or bleeds onto the glass, the render is not trustworthy.
- Export and compare side by side. Save each version so you can judge them together later.
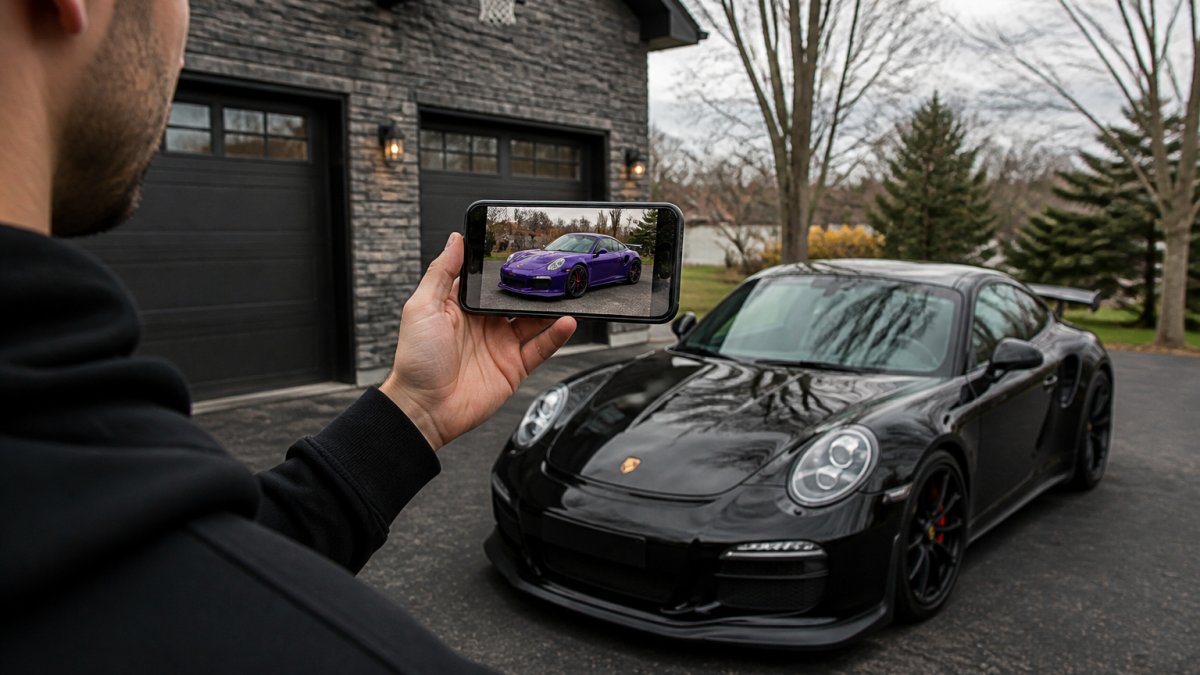
How to Tell a Good Render From a Bad One
Accuracy is the point of a visualizer, so learn the tells:
- Reflections. A believable render keeps the original photo’s highlights and lets them tint with the new color. A flat recolor wipes them out.
- Shadows. The car should still cast and receive the same shadows as the original photo. If the shadow disappears, the panel was replaced, not recolored.
- Panel gaps and trim. Door seams, badges, and window trim should remain visible. If they vanish, the tool painted over them.
- Proportions. For wheels and stance changes, check that the wheel sits correctly in the arch and that the tire size looks plausible.
A common mistake is judging a preview on a phone screen in bright daylight, screens shift color. View the render on a calibrated monitor, or print it, before committing to a finish.
Treat a render as a design decision tool, not a color proof. Use it to compare options and rule out finishes, then confirm the final choice against a physical sample or your installer’s swatch book.
Vinyl Wrap vs. Paint: Which Is Right for Your Car?
Vinyl wrap and paint both change your car’s appearance but differ in cost, reversibility, and surface protection.
Paint is permanent. Once sprayed, it is part of the car, and a quality respray means sanding, priming, and curing, a serious commitment on a collectible or leased vehicle.
Vinyl wrap is applied over the existing finish and can be removed later (Vehicle Wrap Benefits | Avery Dennison).
| Factor | Vinyl Wrap | Paint |
|---|---|---|
| Reversible | Yes, removable | No, permanent |
| Protects original paint | Yes | No |
| Finish options | Gloss, satin, matte, chrome | Limited by spray process |
| Time off the road | Days | Weeks |
| Best for | Leases, collectibles, style changes | Full restorations |
If you may sell the car or want to preserve its original finish, wrap is the safer path.
Vinyl Wrap Durability: What Affects How Long It Lasts
Vinyl wrap durability depends on film quality, sun exposure, washing habits, and installation. A well-installed wrap on a garaged car outlasts the same film on a vehicle parked outside year-round.
Several factors shorten a wrap’s life:
- UV exposure. Constant sun dries and fades the film over time.
- Harsh washing. Automatic brushes and strong chemicals wear edges and dull the finish.
- Poor installation. Trapped air and lifted edges let moisture underneath.
- Road salt and debris. Winter driving stresses edges and seams.
Hand washing with pH-neutral soap and garage parking both extend a wrap’s life. Properly cared for, a wrap protects the paint beneath and keeps the car looking sharp.
Ask your installer which film brand they use and whether it carries a manufacturer warranty. The film itself is only half the equation. Installation quality decides whether that warranty ever applies.
Professional Vehicle Wrap Installation: Why It Matters
Professional vehicle wrap installation is the difference between a factory-looking finish and one that peels at the edges within a season.
Wrapping a car involves disassembling trim and handles, precise cutting, and heat-forming film around curves and recesses.
At 203wraps, our certified technicians specialize in high-end and collectible automobiles, including exotic paint jobs that demand extra care.
Where a cheap install fails: lifted edges, visible seams, and film that traps moisture against the paint.
Frequently Asked Questions
What is the best way to preview a vinyl wrap on my car before installation?
A car wrap visualizer lets you upload a photo of your vehicle and apply different colors and finishes digitally. This helps you compare designs before committing. For the most accurate preview, take your photo in natural daylight from multiple angles. Professional wrap shops can also provide physical samples, which show how the vinyl looks in person and under different lighting conditions.
How long does a vehicle vinyl wrap last?
Vinyl wrap durability depends on the quality of the material, installation, and how you maintain it. A high-quality wrap installed by a certified technician typically lasts five to seven years. Exposure to harsh sunlight, road salt, and frequent automatic car washes can shorten that lifespan. Hand washing and garage parking help extend it. If you notice lifting edges or fading, a professional can often repair small sections without replacing the entire wrap.
Can a vinyl wrap protect my car’s original paint?
Yes, a vinyl wrap acts as a sacrificial layer that shields your paint from road debris, UV rays, and minor scratches. When removed correctly by a professional, the original paint underneath is usually preserved. This is especially valuable for leased vehicles or collectible cars where factory finish matters. For maximum protection against rock chips on high-impact areas like the front bumper and hood, paint protection film (PPF) is a more durable option.
What should I ask a wrap shop before choosing a design?
Ask about the brand and warranty of the vinyl they use, how they handle removal, and whether they provide a mockup before installation. Confirm they are certified installers and ask to see examples of their work on vehicles similar to yours. For exotic or pearl finishes, discuss whether a wrap can replicate that look or if a different approach is better. A reputable shop will welcome these questions and guide you through the options.
Choosing how to change your car’s look is a real decision, and a preview only gets you so far. The finish still has to be installed by someone who treats your car like their own. 203wraps brings over a decade of experience, certified technicians, and a specialization in high-end and collectible automobiles to every job, from vinyl wraps to paint protection film and window tinting. Book now with 203wraps and get a finish built to last.